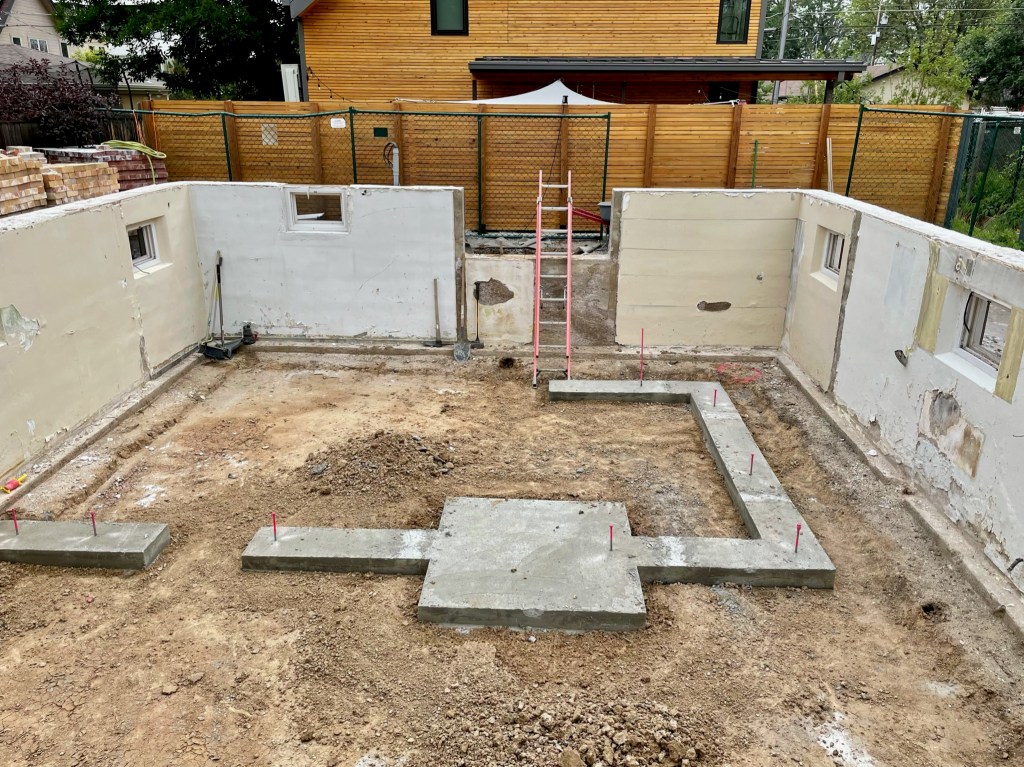
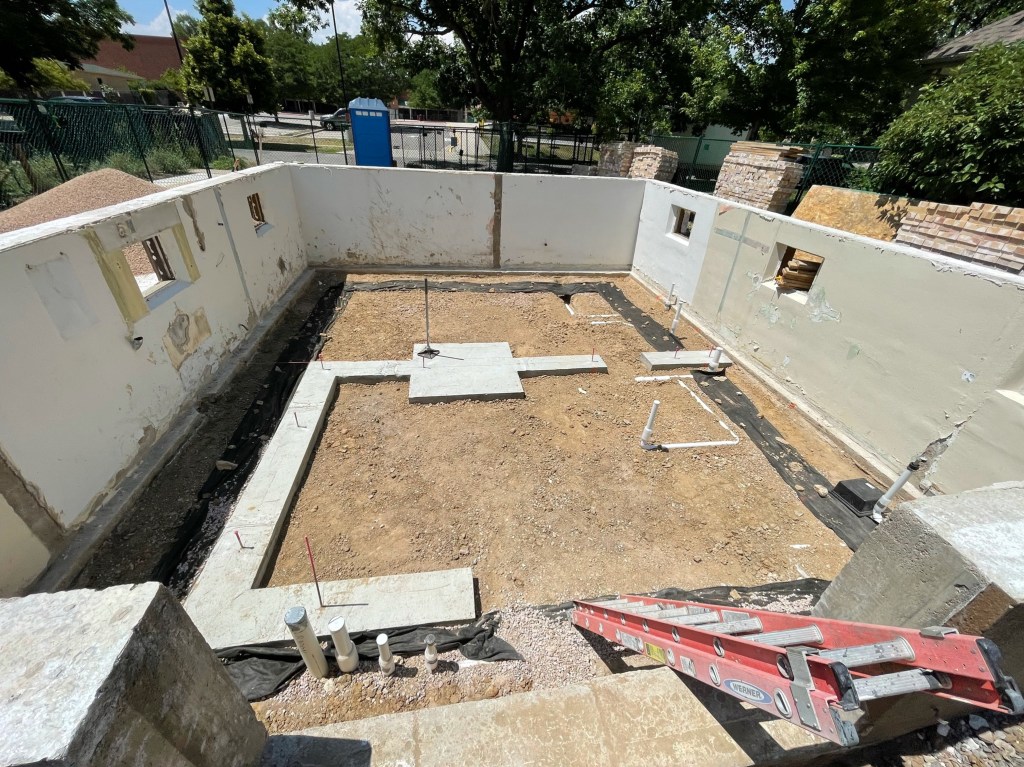
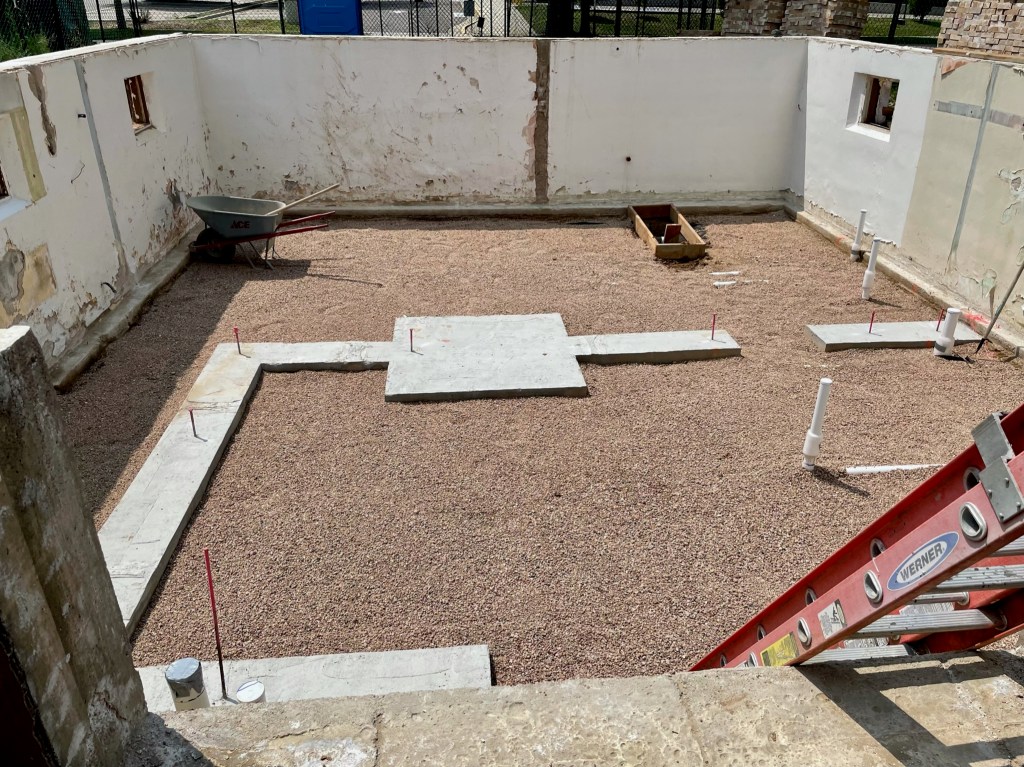
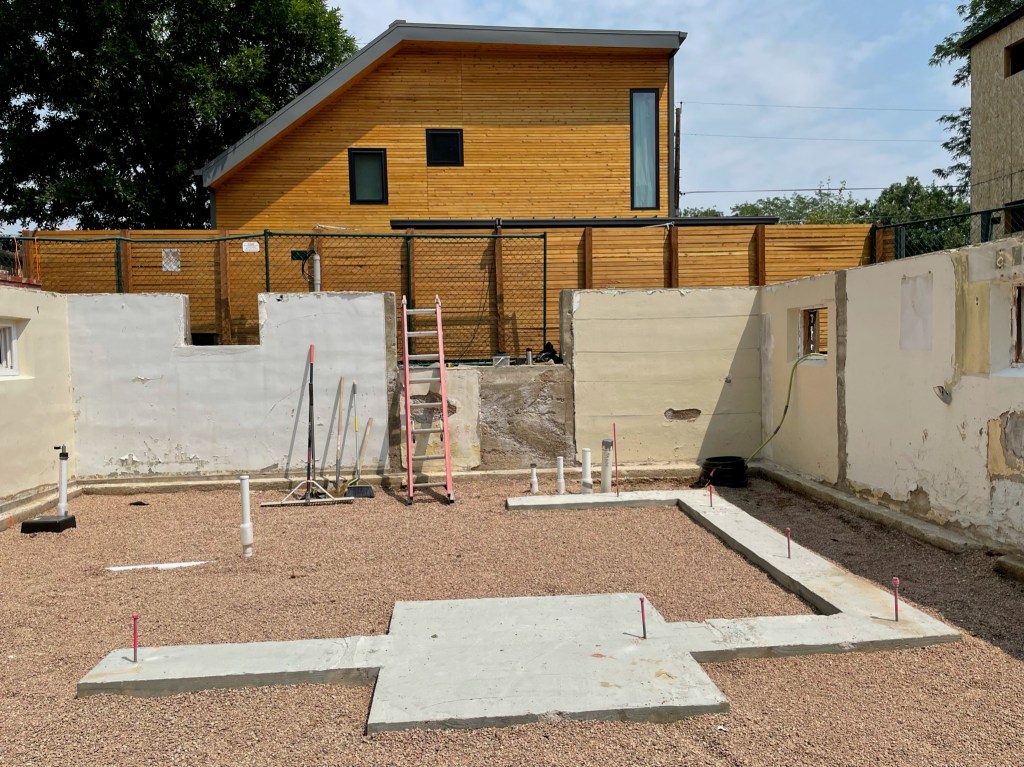
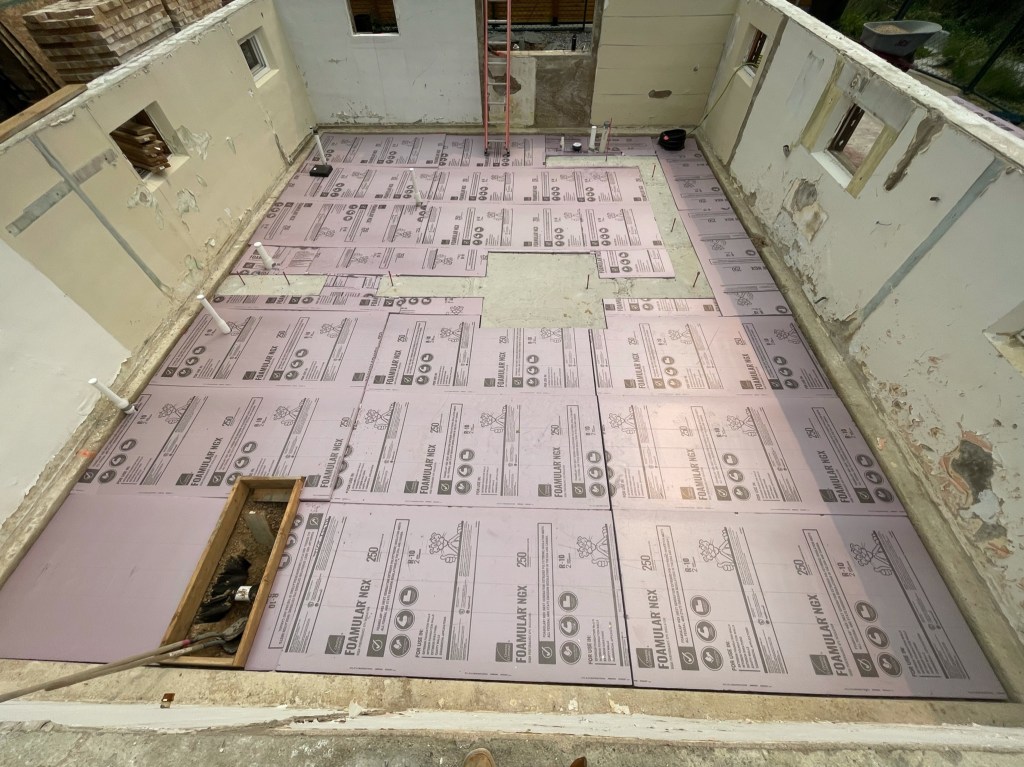
At times it feels like things are going slow but we are moving forward putting all the unglamorous pieces together that make for a thoughtfully built home. Because we demoed the original slab-on-grade (SOG) we are able to add proper drainage, plumbing, and insulation beneath the basement floor. The time-lapse below shows our first forward progress. Foundation footers were formed and poured which will support structural walls. The perimeter underdrain consists of a perforated pipe that drains to the sump pump to prevent any future basement flooding. Then underground plumbing, insulation, and vapor barrier went in just before the new concrete SOG was poured.


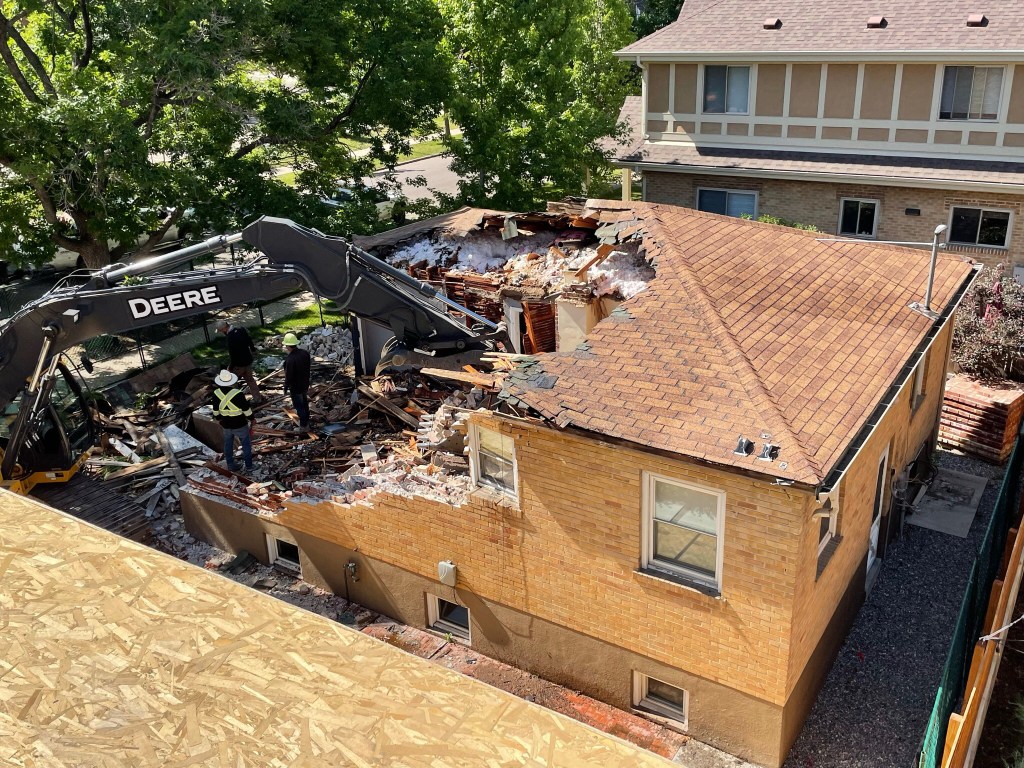
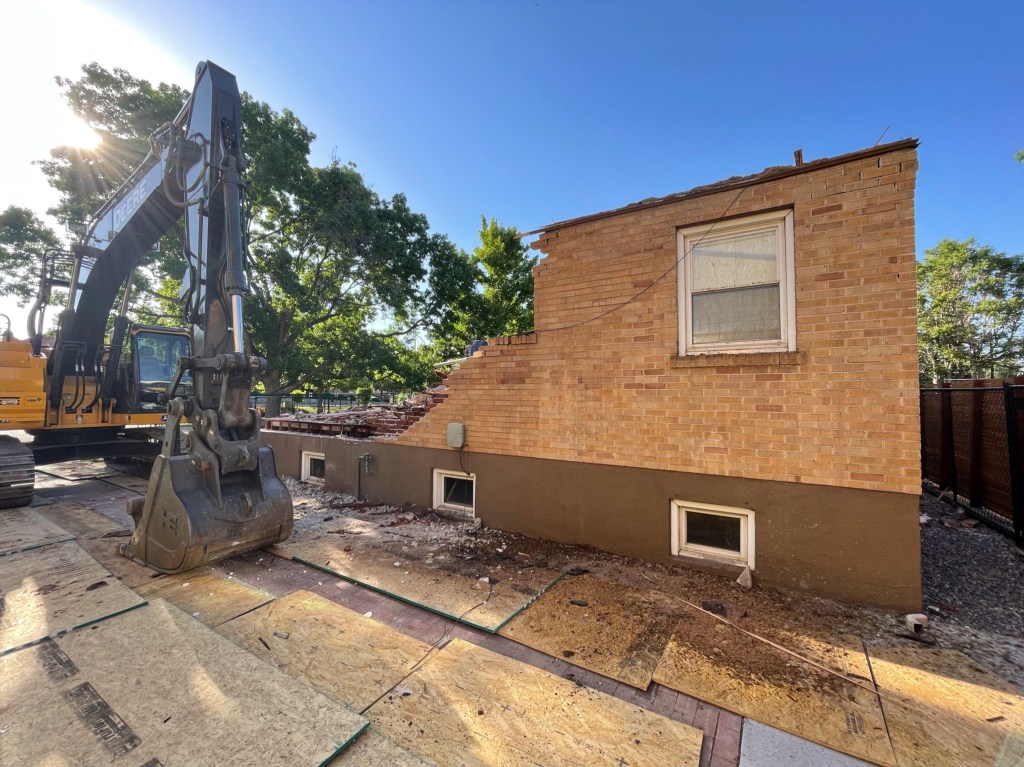
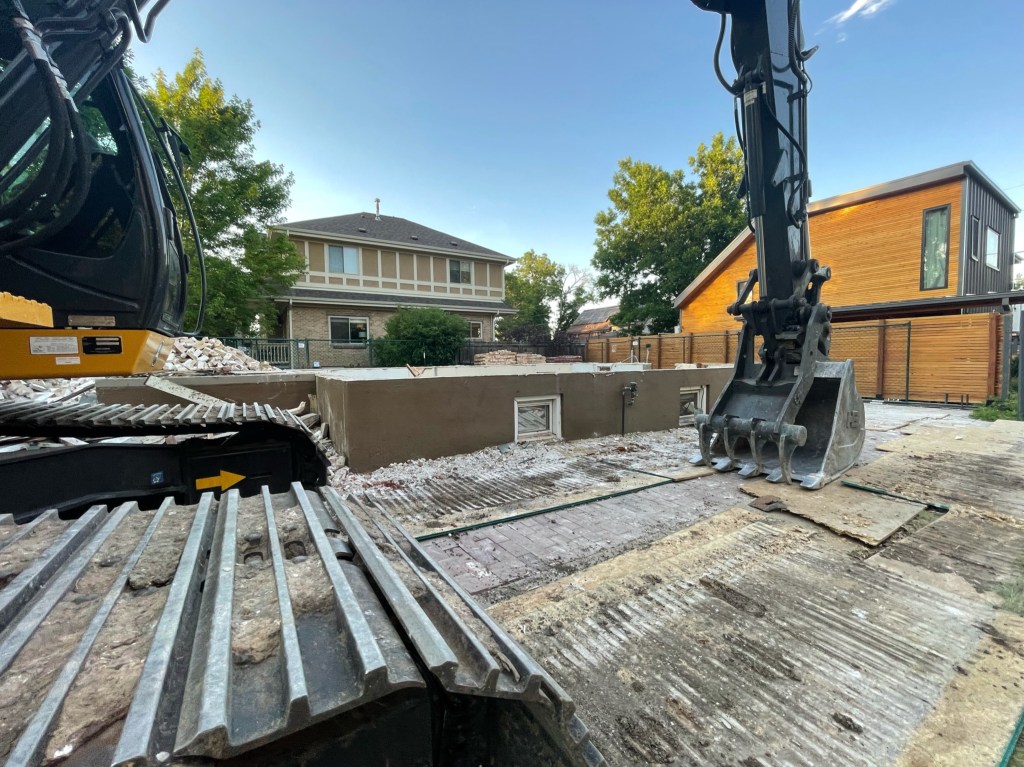
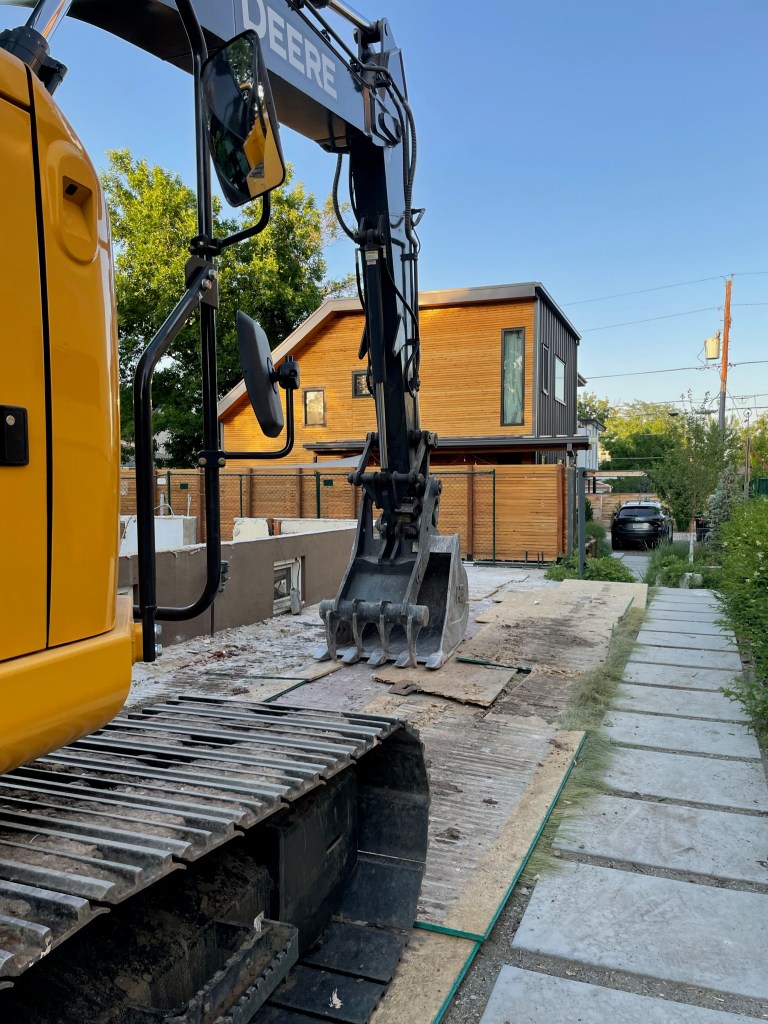
Bungalow Demo
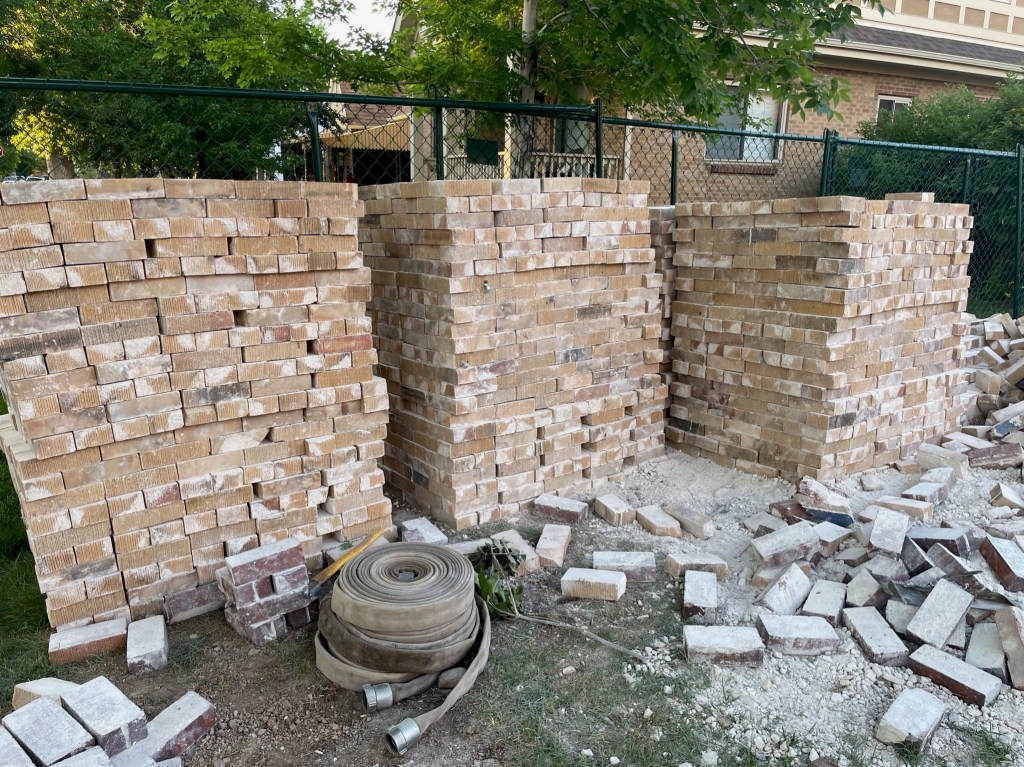
The second phase of our Tandem House project kicked off with the demolition of the 1940’s bungalow. The design drawings give the perception of a pop-top so when we knocked the house down to the basement foundation walls neighbors, family and friends were surprised. We made the decision very early on in the design process to demo the existing brick walls so that we could use SIP panels for the new house structure. That way the house is insulated (as the original home had no insulation) and we can achieve a ‘tighter’ building envelope. Below are images and a time-lapse video of the house being demoed. You can see the meticulous process of knocking each wall down and going back in to save the brick which was stacked aside for the masonry crew when it comes time to re-build the facade. In the end, the house will look like a pop-top but will be built with more modern and efficient practices.


Tandem House 2
After living in Tandem House 1 (the back house) for two years we’re ready to fulfill our vision of designing and building two green homes, one behind the other on a single Denver zone lot. We embarked on this journey four years ago with the intention to defy Denver’s residential building standard, to show that a two-unit lot in Denver doesn’t have to be a side-by-side attached duplex, or a less than maximized single-family-home (SFH) with an ADU behind. We set out to prove that there is a more desirable residential model that respects the historic design character of a neighborhood while capturing the wants and needs of an urban dweller. Some of the greatest benefits of our Tandem House model is maximum lot coverage and square footage as both SFH’s will be over 2300sf, each with 4beds and 3.5baths, their own garage space, private outdoor space and most importantly they are detached. Because who wants to share a wall with their neighbors?!
We believe that this modern urban way of living doesn’t have to be a detriment to the historic character of our Denver neighborhood. Tandem House 1 is clearly a contemporary piece of architecture which was very intentional. Scott and I feel most comfortable living in a simple, clean line, contemporary space that we could design to our hearts’ desire in the back of our lot. By building in the back, we didn’t change the existing character, aesthetic or residential feel of our neighborhood. As architects we want to design and build every project with intention and therefore never replicate the same design or development model over and over. Each one of our projects will always be unique and acknowledge it’s context even when the homes are in tandem and on the same lot.
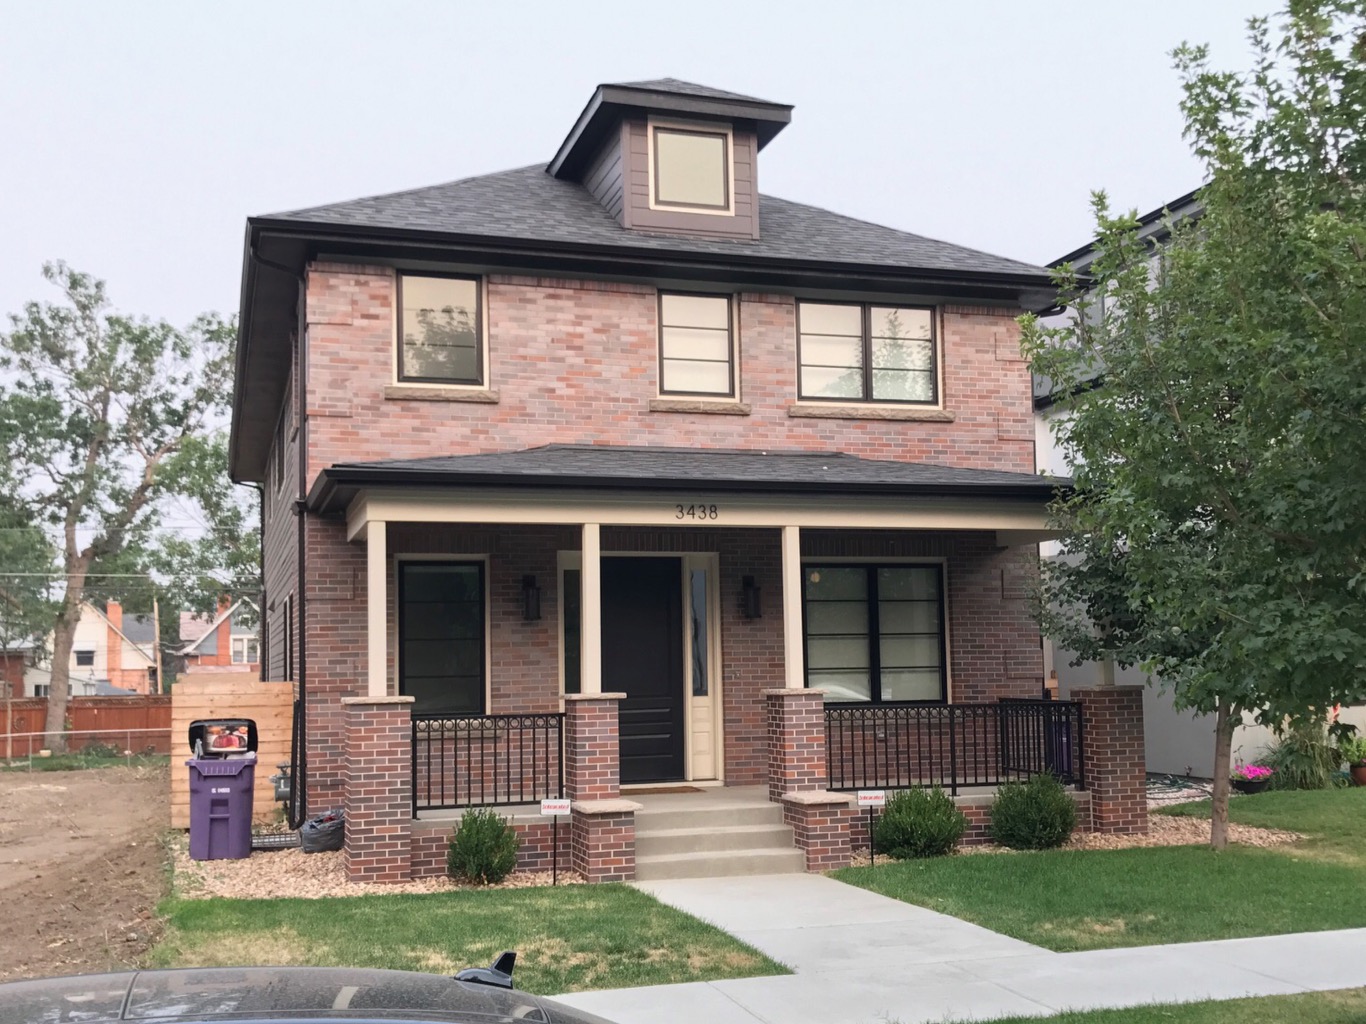
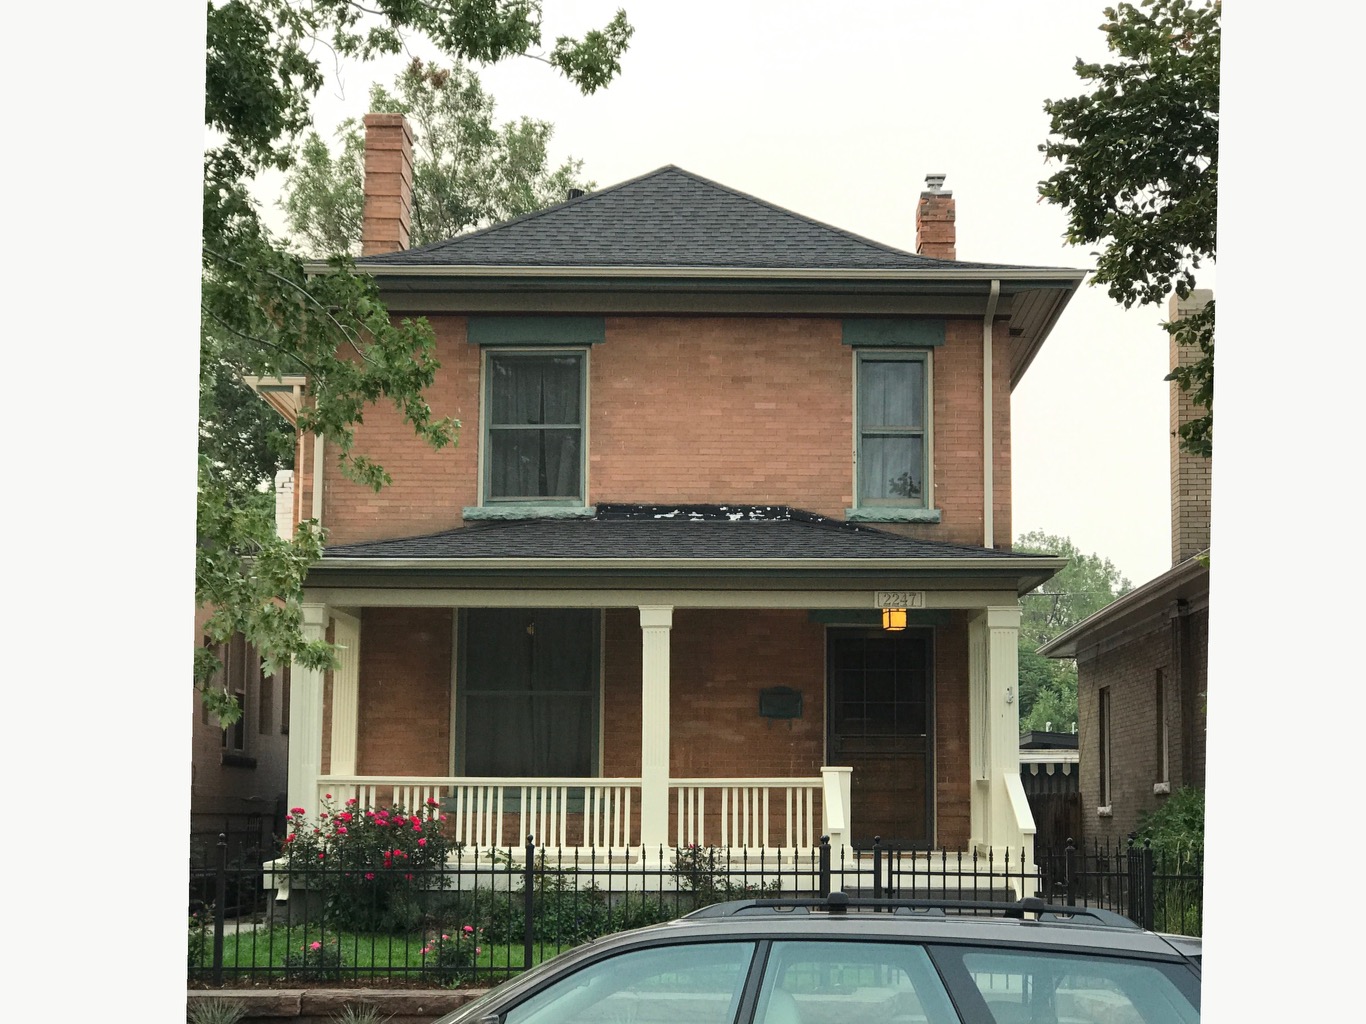
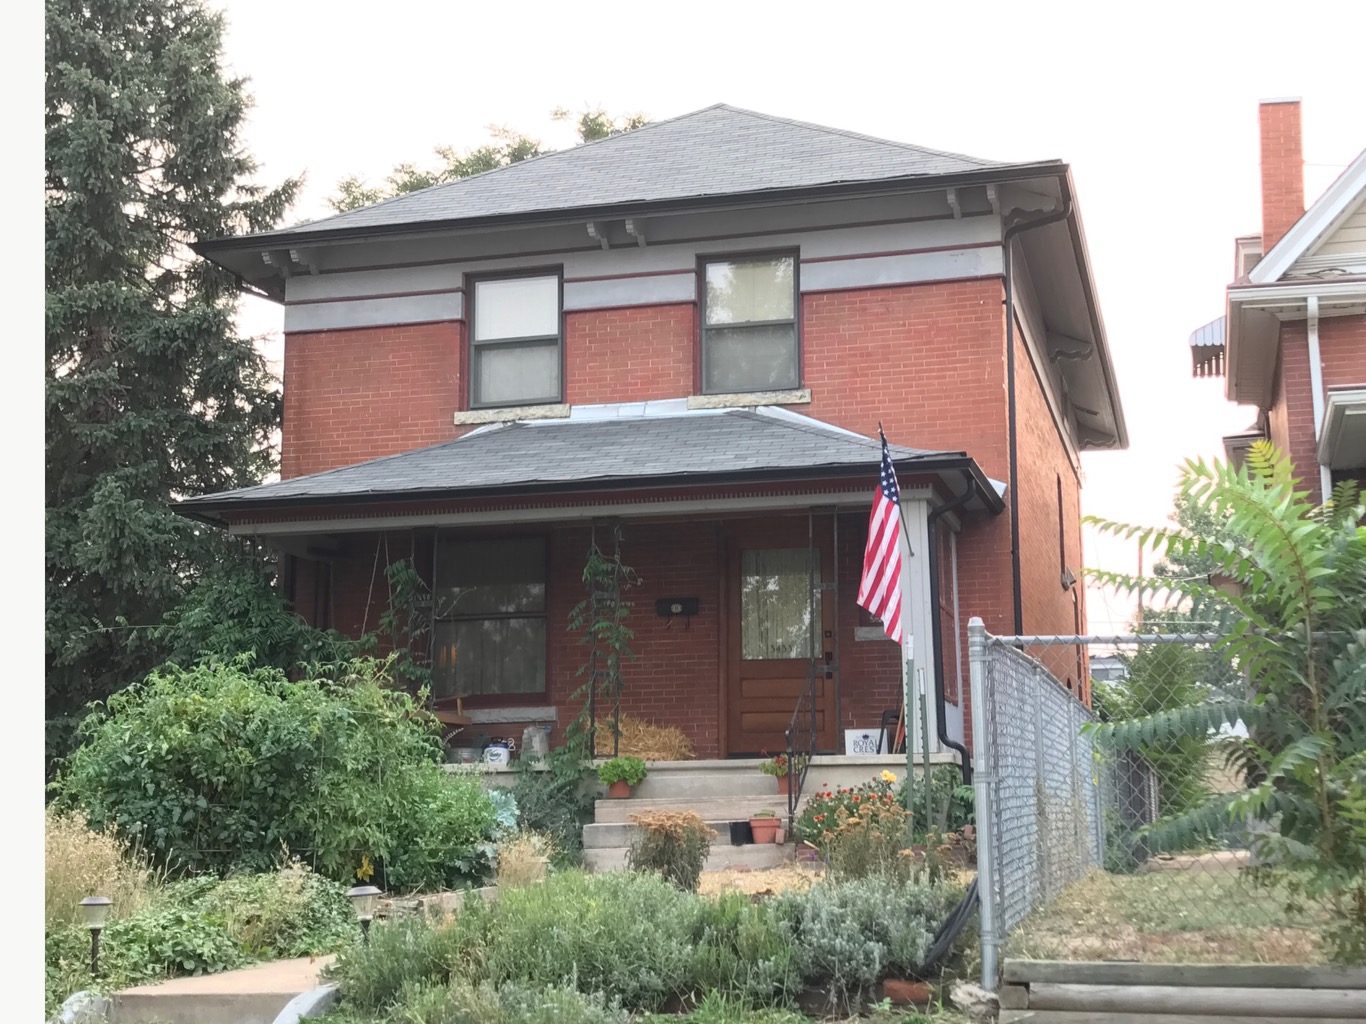
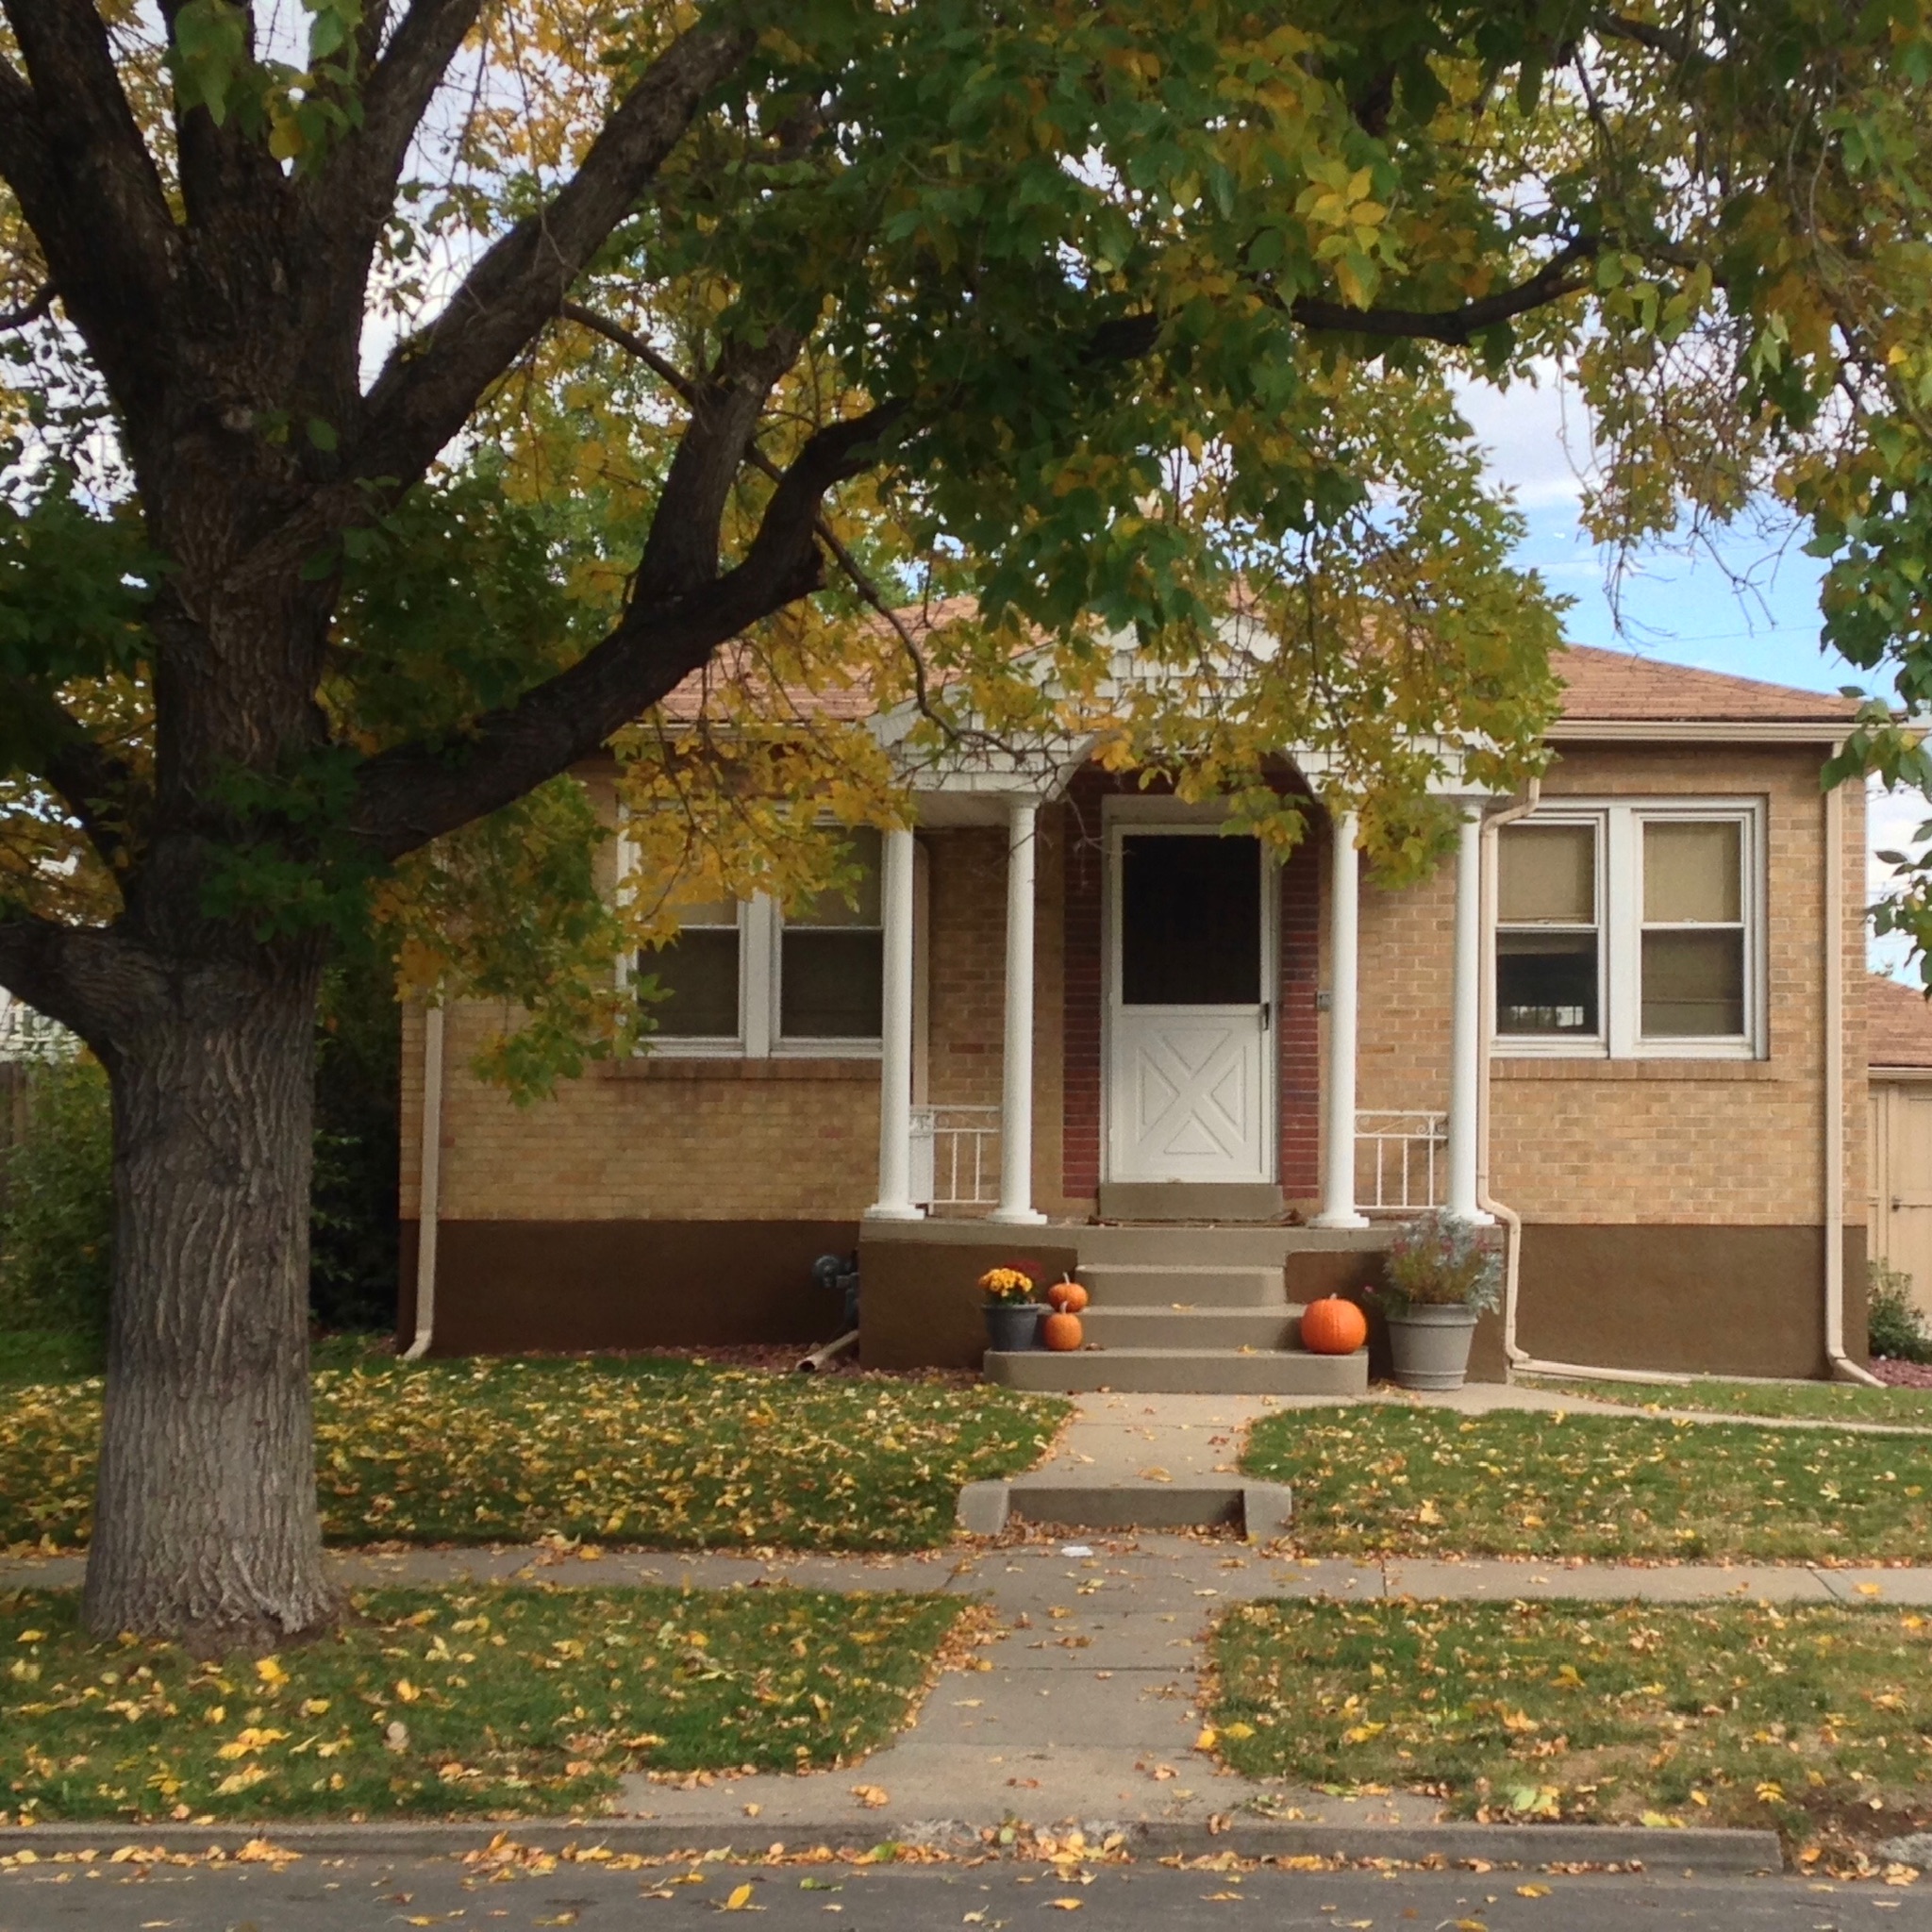
With clearly defined intentions, we drew inspiration for Tandem House 2 from the late 1800s and early 1900’s era Denver Square architecture. Our Highlands neighborhood is sprinkled with this residential building form that we just love for its simplicity and charm. According to the CU Denver News article that defines a Denver Square, the house is charactarized by:
- A square box shape
- Hipped roof
- Wide porch
- Quiet Style
- Centrally placed front door
Below are examples of old and new Denver Squares in our neighborhood in which we drew inspiration.
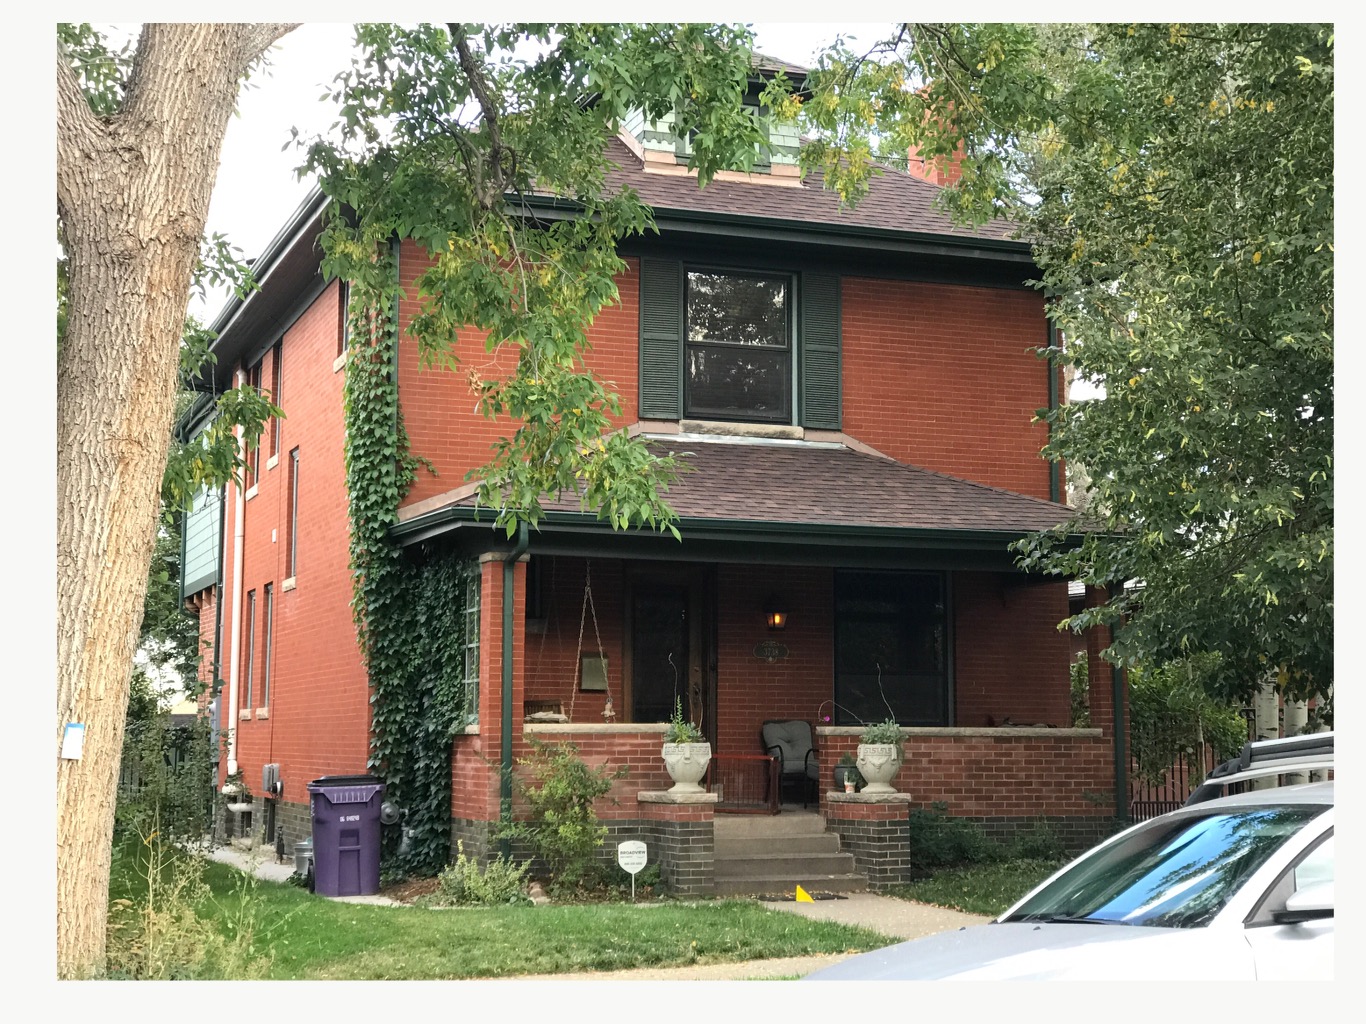
Historically the building form was beneficial to narrower city lots as the simple 4 sides, two stories and 30 foot width allows for maximum use of the available land that is consistent with our efficiency of space development model. The form allows us to keep our existing house footprint (~30 foot width) and basement. Instead of building out we will build up by raising the first floor for higher ceilings in the basement and add a second story to the current 1-story home.
Demolition will be a careful process as we plan to save and re-use the existing brick façade. If you remember, Scott and I meticulously demoed our old 1-car garage (see Demo Part 1); cleaning and stacking every brick (prior to having kids!). We’ve stored and moved those salvaged bricks three times and we’re finally ready to use them for their final intended use!
We submitted our permit drawings to the City of Denver last month and just received their comments. We plan to respond within the week and re-submit with the goal to start demo in April which isn’t aggressive at all since we are due with our second kid on April 4th (sense the sarcasm)! We had our daughter when we were building Tandem House 1 and will now have our son as Tandem House 2 commences. We plan our builds around maternity leave!
LEED Platinum

An overdue post about achieving LEED Platinum Certification which was officially received at the end of 2019. Our final LEED v4 HOMES scorecard scored a total of 81 points. Our final HERS score was 34 (44 w/o PV). We beat our preliminary pre-construction projected HERS score of 39, and our blower door test came in at 0.91 ACH50. After almost two full years of tracking the Solar PV, it is meeting 20% of the annual demand for our all-electric house.
Photo by Brett Blackmon 
Photo by Brett Blackmon 

Finished Landscape
The design of outdoor space was addressed early on in the conception of Tandem House and helped guide site design decisions to ensure that exterior space was an extension of the home. Contrary to most new builds we really wanted the backyard and entry sequence to be beautiful and functional for our young family. Instead of tolerating the underwhelming builder-grade landscape that every million-dollar home in the neighborhood has, we obviously pushed the standard just like everything else with Tandem House.
We’re confident that the market will appreciate the result but for now, we are happy the landscape is complete and we’re ready to enjoy!
If you’re interested in checking out the landscape build process look back at past posts and enjoy photos of our young landscape below.
- Landscape Site Work
- Landscape Grading and Drainage
- Hardscape – Concrete
- Hardscape – Brick
- Xeric Landscape


Rainscreen System
We are now 99% done with house facade. The install of the cedar rainscreen system complements the previously installed standing seam metal siding. The two-month effort involved myself staining wood during the week and Scott, with the help of a friend and our brother-in-law, who spent the weekends installing it. We selected cedar wood because it lasts well against the elements in Colorado and the stain we used was the PPG (formerly Sikkens) SRD Wood Finish Transparent Matte in the Natural Wood color. We stained all sides before install that should hold up for 5-7 years, at which point we would re-stain the front exposed face.
The rainscreen system is a different cladding approach to the standing seam metal siding that is on the south and north facades of the house. The metal standing seam material works well for what is called a wall-barrier system approach which basically eliminates the possibility of water, vapor or air from ever coming in contact with our SIP panels. Assuming that install is meticulous and ensures tight seams between panels; the metal siding is essentially impermeable (for this approach you most likely wouldn’t use wood which is permeable). We especially liked using metal material on the South facade because it will hold up to direct sun exposure throughout the year.
Contrary to the wall-barrier approach, the rainscreen system that we used on the East and West faces of the house is designed to allow water, vapor and air to come in contact with the exterior wall (SIP Panel). When designed and installed correctly, the rainscreen controls and directs moisture. Together with proper ventilation, this method will prevent water from accumulating; allowing it to either dry out or evacuate the system.
Below are images that exhibit the system. The 1/8th inch spacing between cedar boards and the air gap between the house and the cedar screen controls the flow of water, vapor, and air. With the spacing between cedar planks and the air gap behind the screen, water is able to evacuate while air and vapor help to dry it out.

Unstained Cedar

Staining Station

The soffits are cladded in the same Cedar as the siding.

Thin black wood planks are spaced evenly directly onto exterior wall SIP Panels. These are what creates the air gap between the house and the Cedar Screen.


Scaffolding


East Facade


1/8th inch spacing between cedar planks.


Front door


Garage – East Facade


Xeric Landscape
Tandem House was conceived to be a sustainable home that is achieved in every respect from using SIP panels, solar panels, and an efficient HVAC system (among numerous other things). The house will be LEED-certified (we should have the certificate any day now) and the landscape is a major component to receiving the necessary points required for the certificate.
We see the landscape as an extension of the home and the sustainable concept flows through every exterior detail. By opting to eliminate the need for irrigation the plant selection includes all Colorado native and adaptive species. Once established the plants will sustain off the ebbs and flows of the environment that it’s meant to thrive in. The artificial turf lawn requires zero maintenance and no water.
 [click image to enlarge]
 The grading and flow of water on-site is a big factor in plant selection, ensuring that plants that require less water are at a higher grade and those that thrive off more water are at low points. The water diagram below shows the flow of water on-site and from the roof downspouts. The water that is handled on-site, flows to the native grass rain garden that can handle large water events with droughts in between. The landscape acts as a sponge, soaking and cleaning water as it flows through the site and into the groundwater system.
 [click image to enlarge]
Once we plant the few remaining plants and complete construction site cleanup we will have the landscape professionally photographed. Stay tuned!
Hardscape – Brick
Now that Tandem House and the landscape are almost done it is hard to remember what existed before this all started. This post requires a look back at the original one-car garage that we demoed two years ago (pt. 2). If you remember, we saved the brick and stacked it for future use. We used the red brick (the inside layer of the old garage) to pave the ribbon driveway. In a few weeks, we will fence in this area to give the front house a side-yard (stay tuned).


Hardscape – Concrete
Back in May, we conquered the concrete pathways and back patio. Once the subgrade material was compacted and set to 3 inches below final grade per the site Grading Plan and concrete details, we were ready for concrete formwork! Because the landscape design is fairly complicated (from a grading and pavement perspective) it was important that we had a detailed Layout and Materials Plan (per the landscape drawings) and use this as a tool when getting bids for subcontractors. Because concrete itself is a simple material, its crucial that the contractor is detail-oriented and doesn’t deviate from the drawings unless otherwise instructed on-site.
The most important time to be on-site was to oversee the building of concrete formwork to ensure that layout and grades are set correctly. Once the concrete is poured and set it’s difficult to correct which is why it’s crucial to get right beforehand.


After two days we were ready to pour!


Once the concrete forms were stripped, it’s easy to see the 4″ gap that is left between each concrete pad. This 4″ border was further accentuated and held in place with steel edger and lined with filter fabric. The border was filled with decomposed granite to complete the look. The final product breaks up the mass of hardscape for a soft and contemporary feel that matches the house aesthetic.


Landscape Grading and Drainage
This summer has been focused on the landscape and exterior of Tandem House. We have two open permits that have yet to be closed pending Zoning and SUDP (Sewer Use and Drainage Permits) final inspection and approval. Once these permits are closed then we will finally have our Certificate of Occupancy.
Zoning has already confirmed that the building fits within the bulk plane and setback requirements (among other things), but a few items have yet to be done. In order to get our Zoning permit closed the City wants to see that all landscaping be complete, that no lingering construction material be on-site and that they approve all exterior lighting.
The Sewer Use and Drainage Inspection ensure that the flow of water is away from the house and handled either on-site or directed properly towards the alley. It also dictates that sump pump discharge is handled on-site and inspected per the City’s detail.
A good landscape design understands that both subjects go hand-in-hand. A successful landscape design acknowledges grading and drainage from the very start because it dictates cut and fill, site retaining, steps, access points, circulation and the flow of water. A major factor in our landscape design was dictated by the final Finish Floor Elevation of the house which is 3.5′ lower than what was existing. Hense excavation and the hauling of dirt off-site was a huge endeavor and a major cost. This was a big learning experience for myself as a landscape designer. From this personal experience as the homeowner, I now understand the importance of limiting the amount of cut on-site by finding creative and resourceful grading solutions that limit the need to haul dirt away. In the middle of a construction boom in Denver, hauling dirt away is more expensive than ever because everyone is building basements and underground parking. Most construction sites are getting rid of dirt (cutting) not filling. Hence the problem. Dirt has to be loaded one truck at a time and hauled away 40 miles north.
This Spring we prepped the site for landscape. All major excavation was complete so we began by installing a wood retaining wall at the south property line. The wall now holds back the 3.5′ of dirt from our neighbor’s yard; preventing it from eroding or collapsing onto our site. With the wall up, it allowed us to prepare for what would become a large rain garden.


Step 1: The Rain Garden
The rain garden is the foundation for site drainage and a major landscape component. To build the 200 SF rain garden we had to excavate another 2.5′; that’s on top of the 3.5′ that was originally excavated. Once the garden was dug, we directed roof run-off via downspouts. As the water exits the downspout it enters a catch basin and that leads under the now sidewalk and into a dry rock well at the bottom of the rain garden. We also directed the sump-pump water to the rain garden. If there is ever excessive groundwater from a rain event, the sump will pump the water up and away from the house foundation into a second dry rock well at the bottom of the rain garden.
Once the water was directed to the rain garden we filled it with a soil mix that promotes drainage. The mix is made up of 30% sand, 25% compost, 25% topsoil, and 20% clay. To complete the rain garden we planted two Rocky Mountain Glow Maples and a mix of Colorado native grasses (little bluestem, blue grama, and switchgrasses among the ten different species). This rain garden is not irrigated and once established it will be fully supported by natural rainwater events.


Step 2: Fine Grading & Artificial Turf Prep
Below is our SUDP plan. This is subsequent to the more detailed grading plan and shows where water is flowing. The ‘infiltration swale’ is the rain garden. Downspouts and flowlines (FL) show where water is being directed away from the house foundation.
Below are images that show the aggregate base for the artificial turf detail and the sloping landscape away from the house with french drains that lead runoff towards the rain garden.


We chose not to irrigate our landscape and to make that come to fruition we installed an artificial turf lawn. The manufacturer is synlawn which is a great product. The proper foundation for artificial turf is crucial for efficient drainage. To prep for the lawn, we removed 4″ of earth where the turf is installed, filled the area with 3″ of 3/4″ aggregate, compacted that and added 1″ of pea gravel. We lined the area with a steel edger which completed the prep work. To install the lawn we rolled it out in place, made a few cuts and seams and pinned the lawn down with 6″ non-galvanized steel nails.
The lawn is now a fantastic place for our one-year-old daughter to play. We completed it just in time for her first birthday!


